After working on Spartan game engine for so long, it became increasingly obvious that there are many interesting things that I could be writing about. However, I kept postponing it as I was growing fond of Hugo and didn’t want to invest any content (or money) on WordPress anymore. The good thing is that I’ve finally found the courage to transition to this slick and fast site you’re browsing now!
I want to start things off with a simple and short blog post, yet have some immediate results we can enjoy. You know, something like the kind of instant gratification you get by watching a Bob Ross episode. An approach which I believe to be one of the most efficient forms of conveying information. So, let’s explore something that with a little bit of effort, might give us just that. Time for some screen space shadows 😄
Screenshots
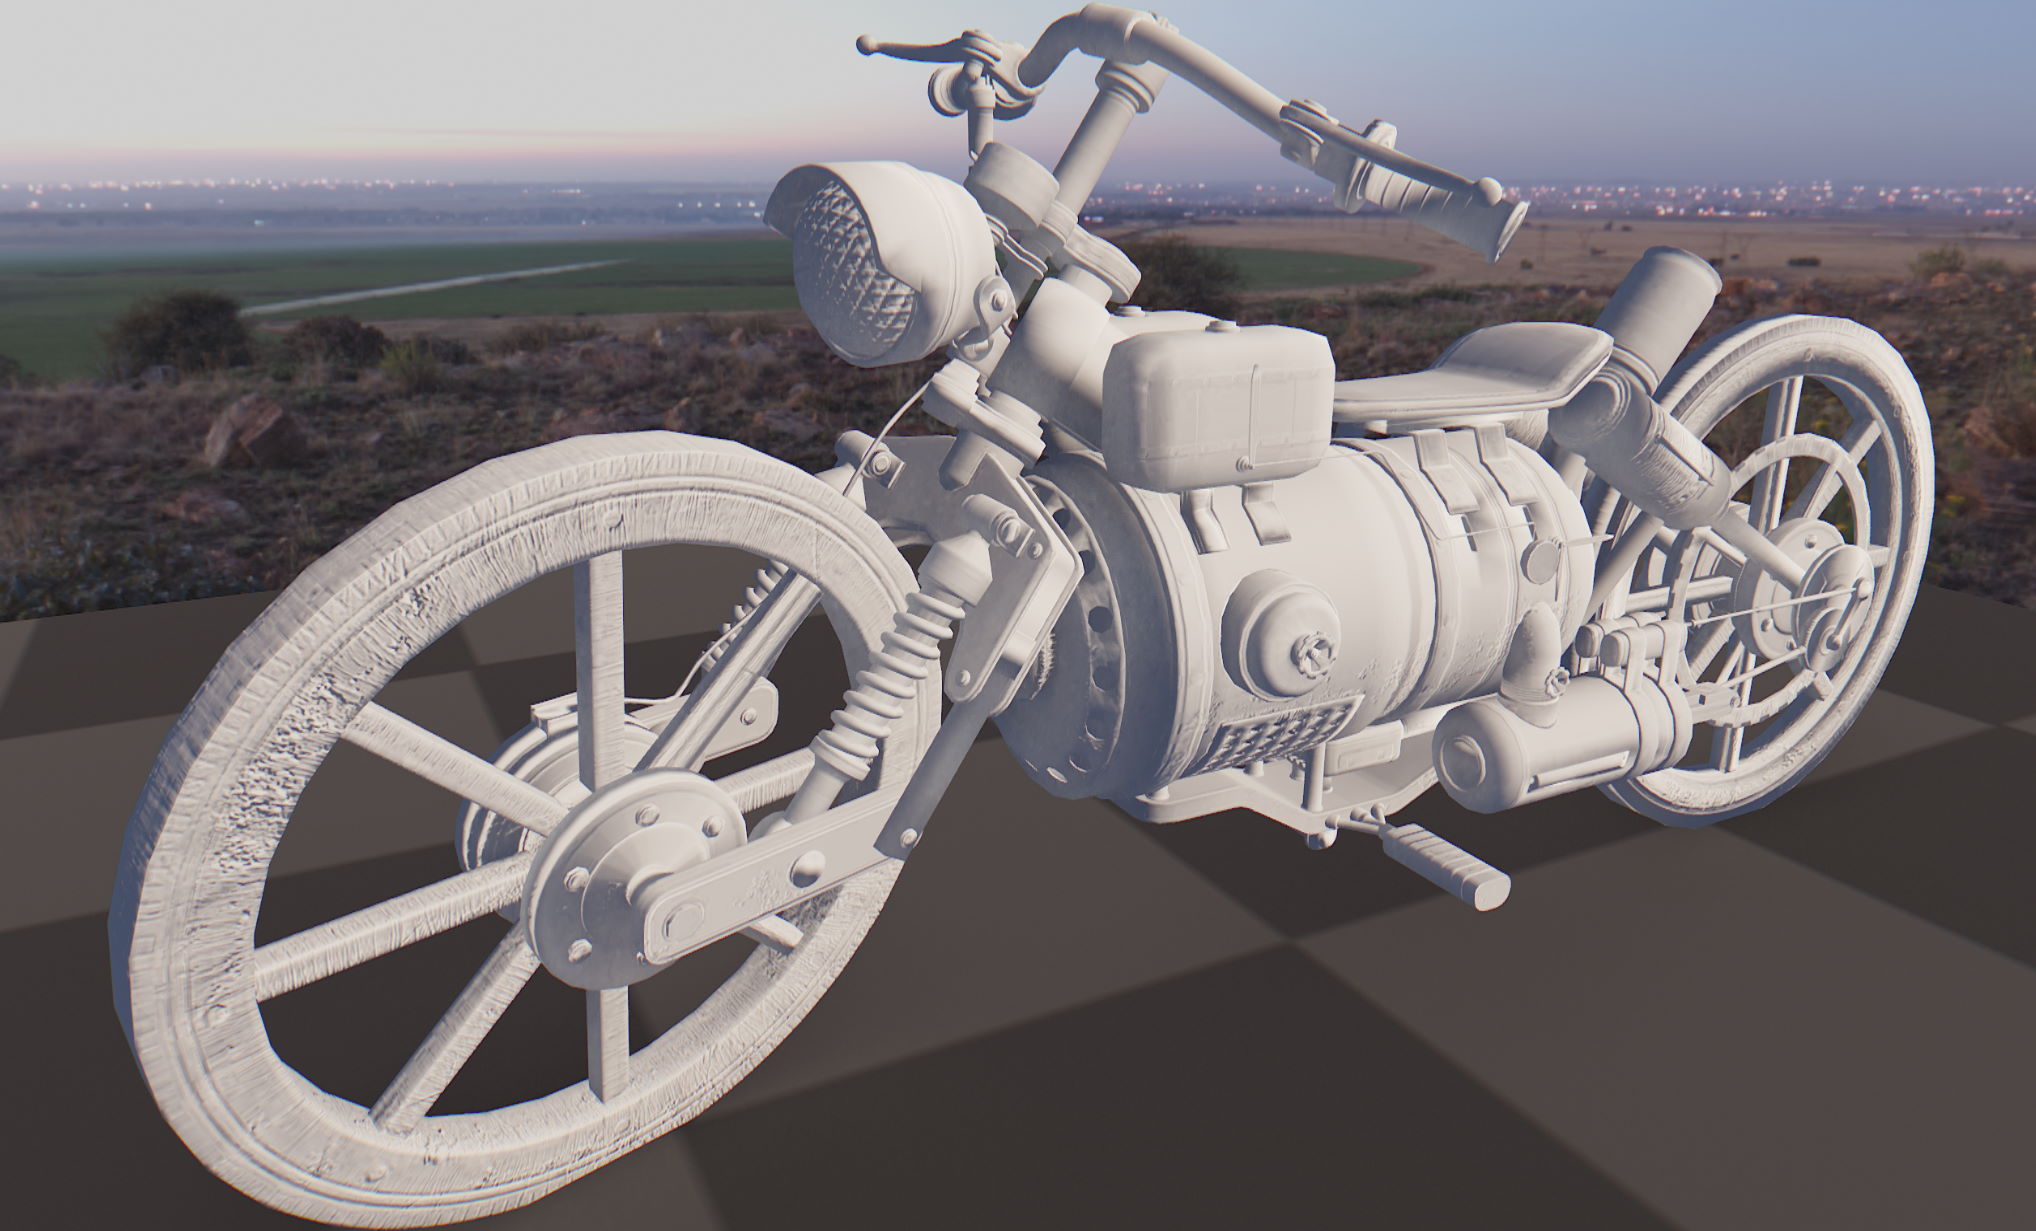
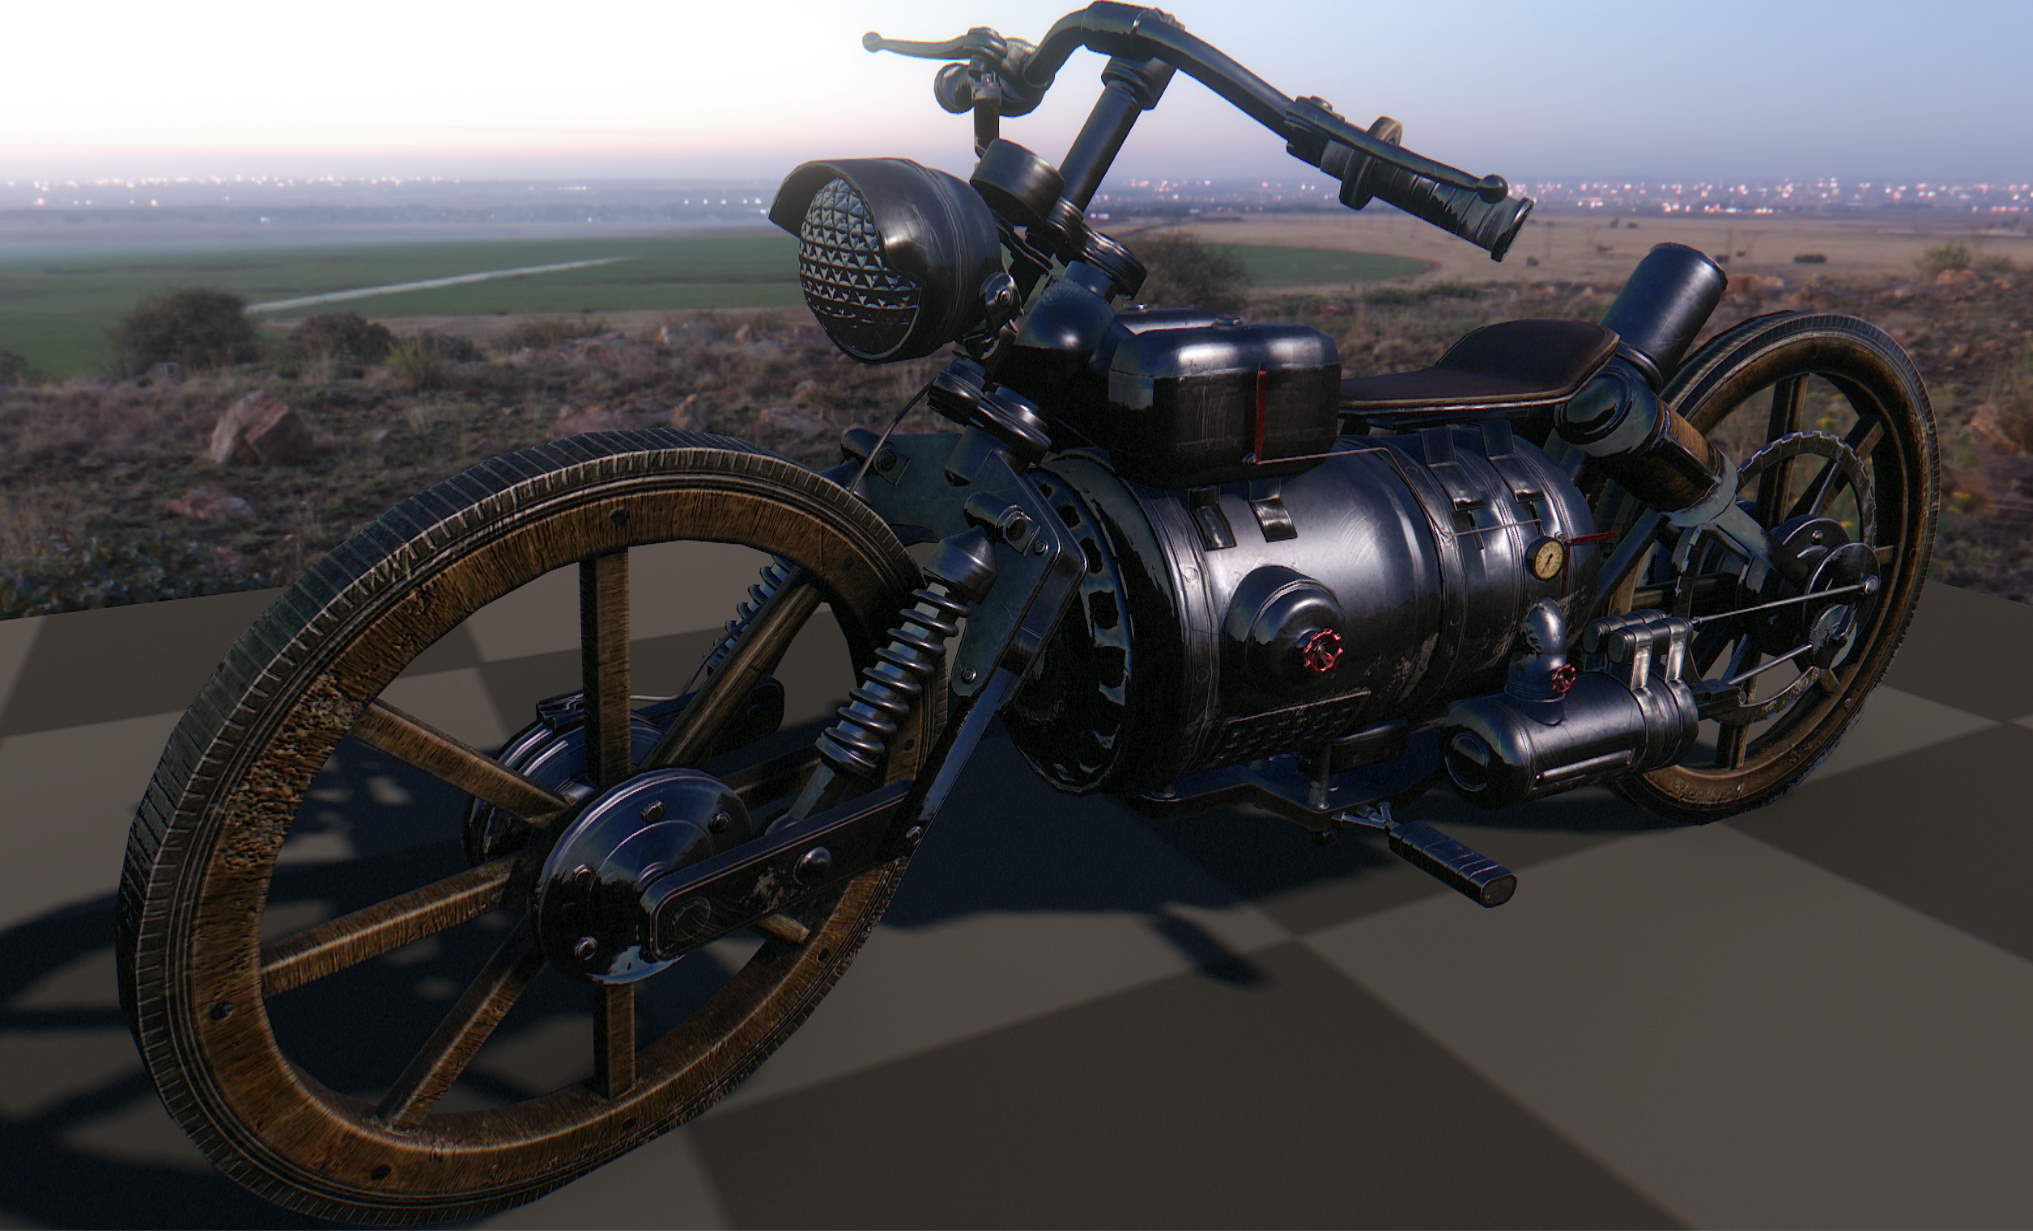
Here is a wild west motorcycle (courtesy of Matija Švaco) without any shadows.
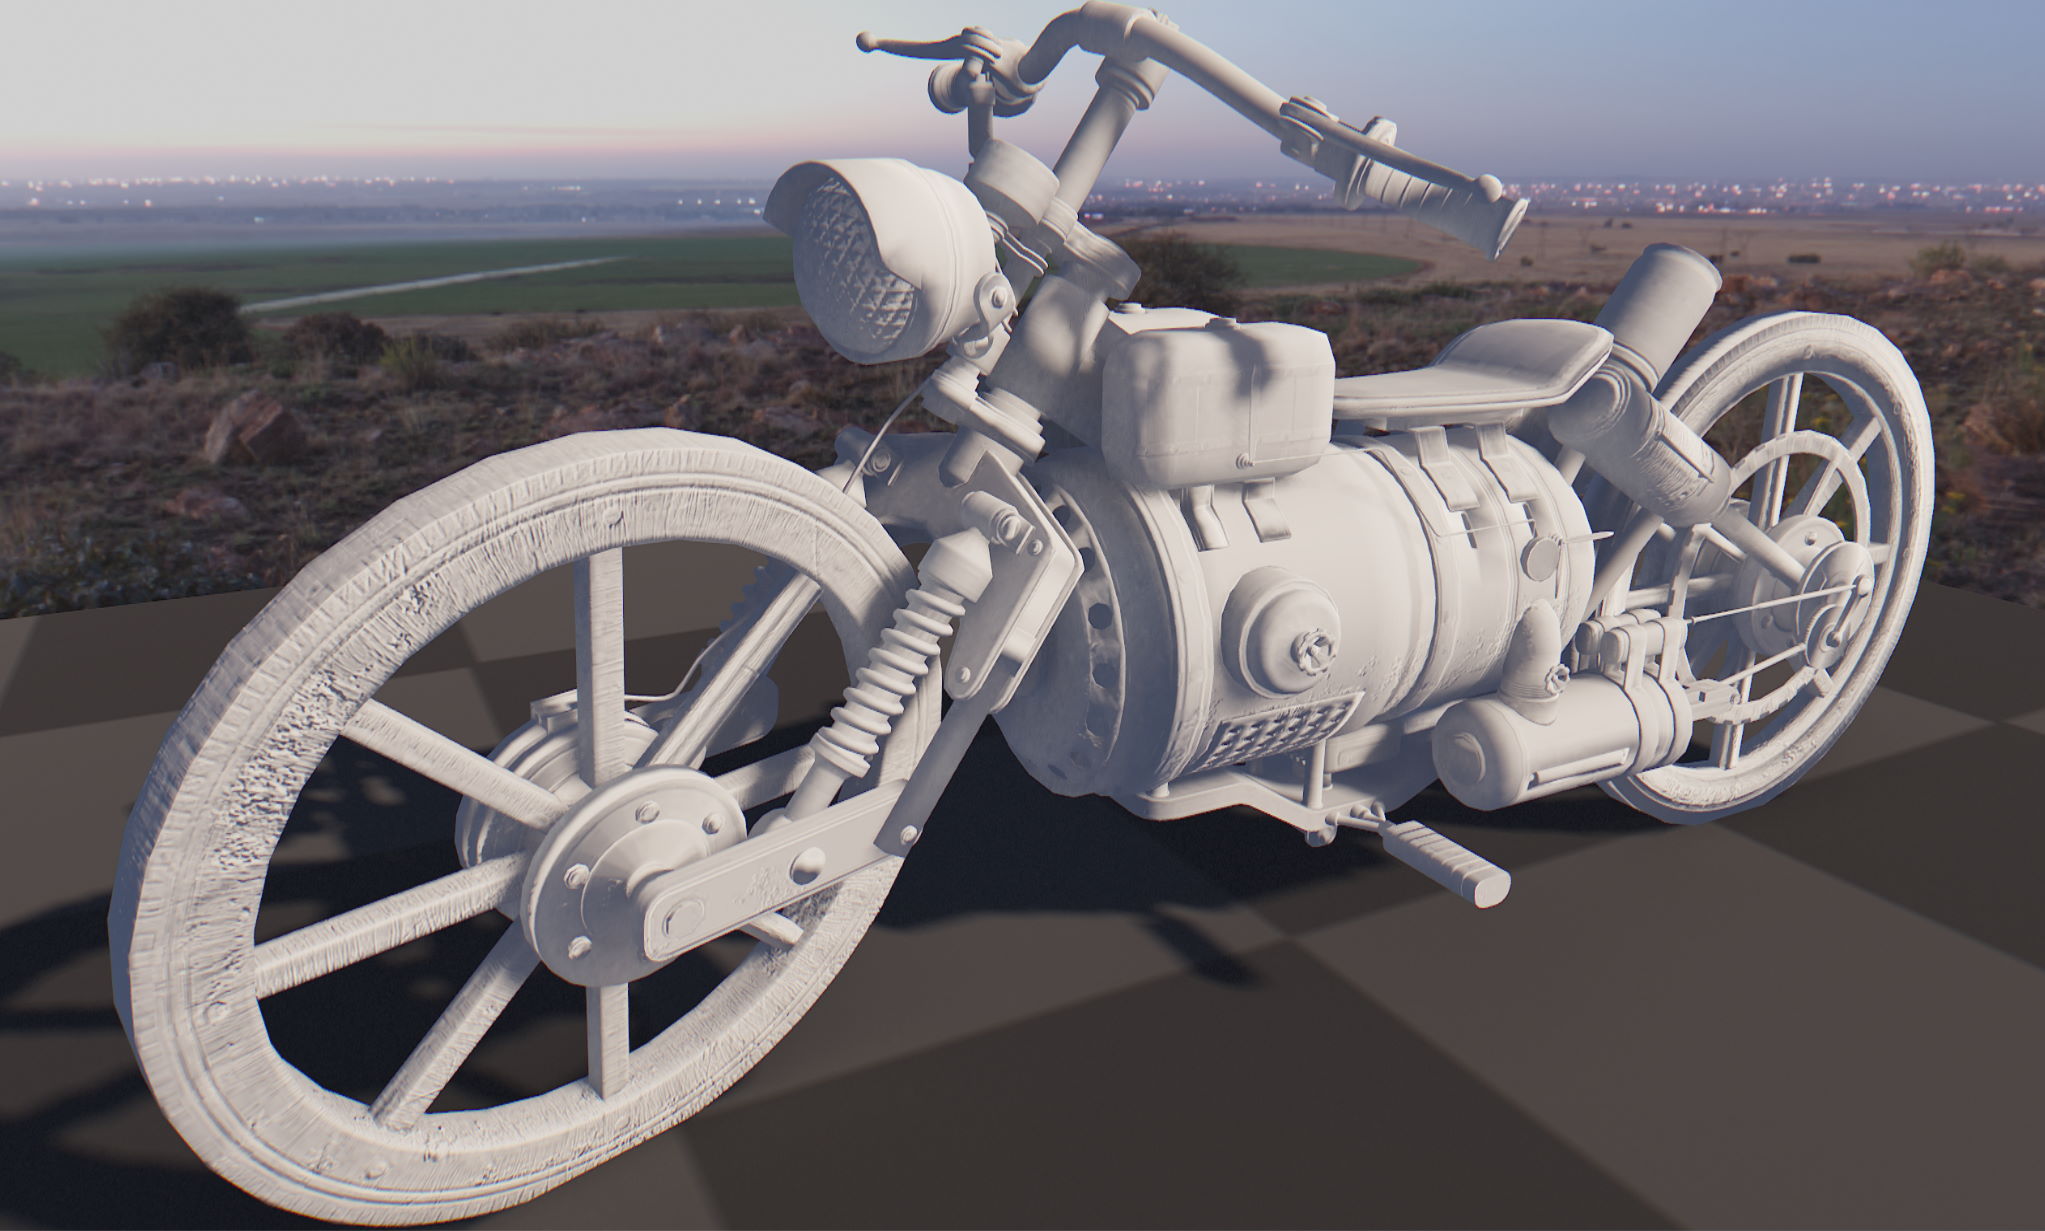
If we enable shadow mapping, we can introduce some nice large-scale detail, a nice first step.
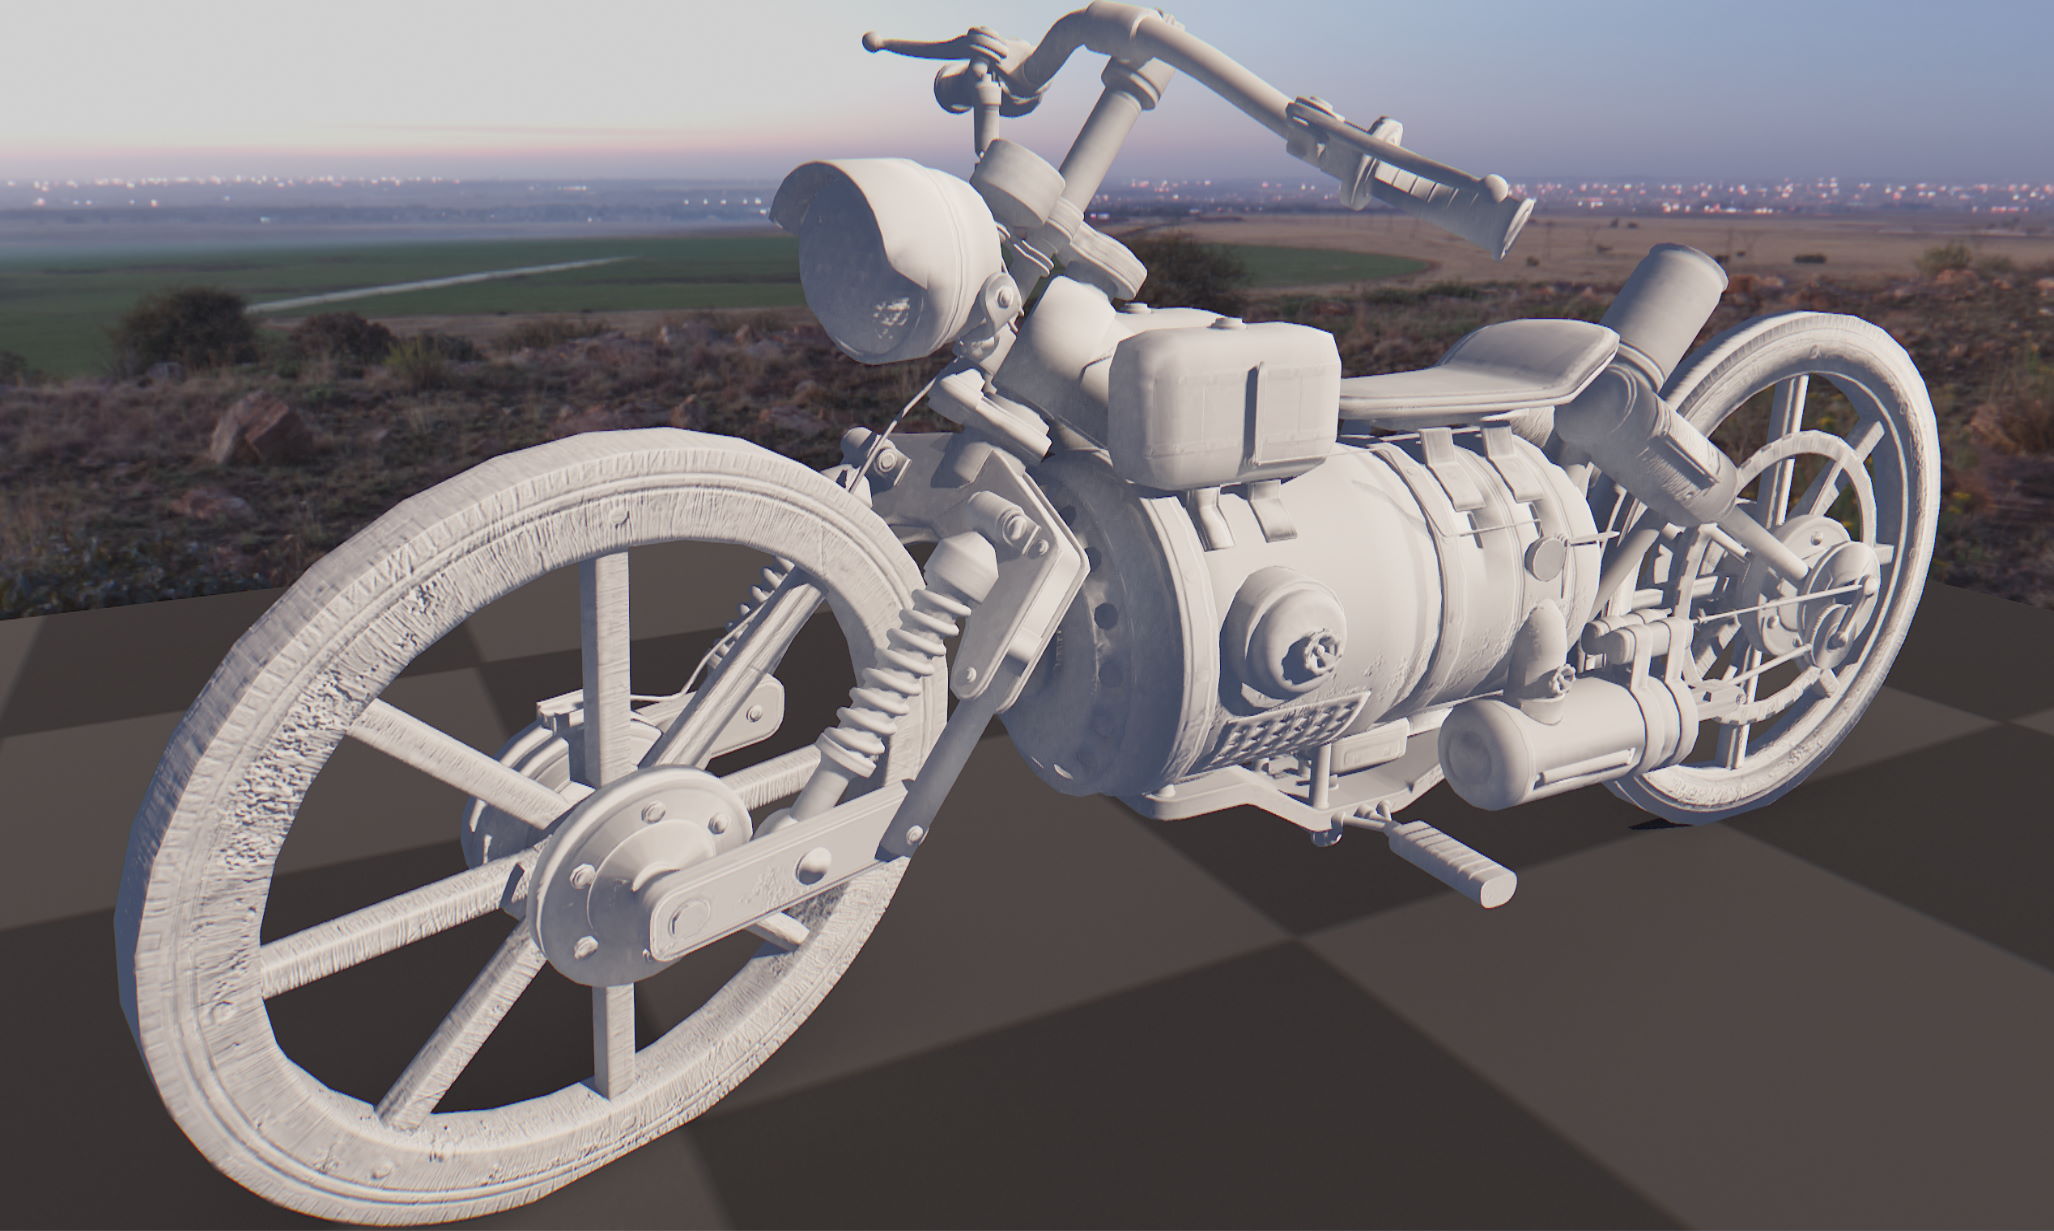
What if we enable screen space shadows? Well, we get some nice small-scale detail.
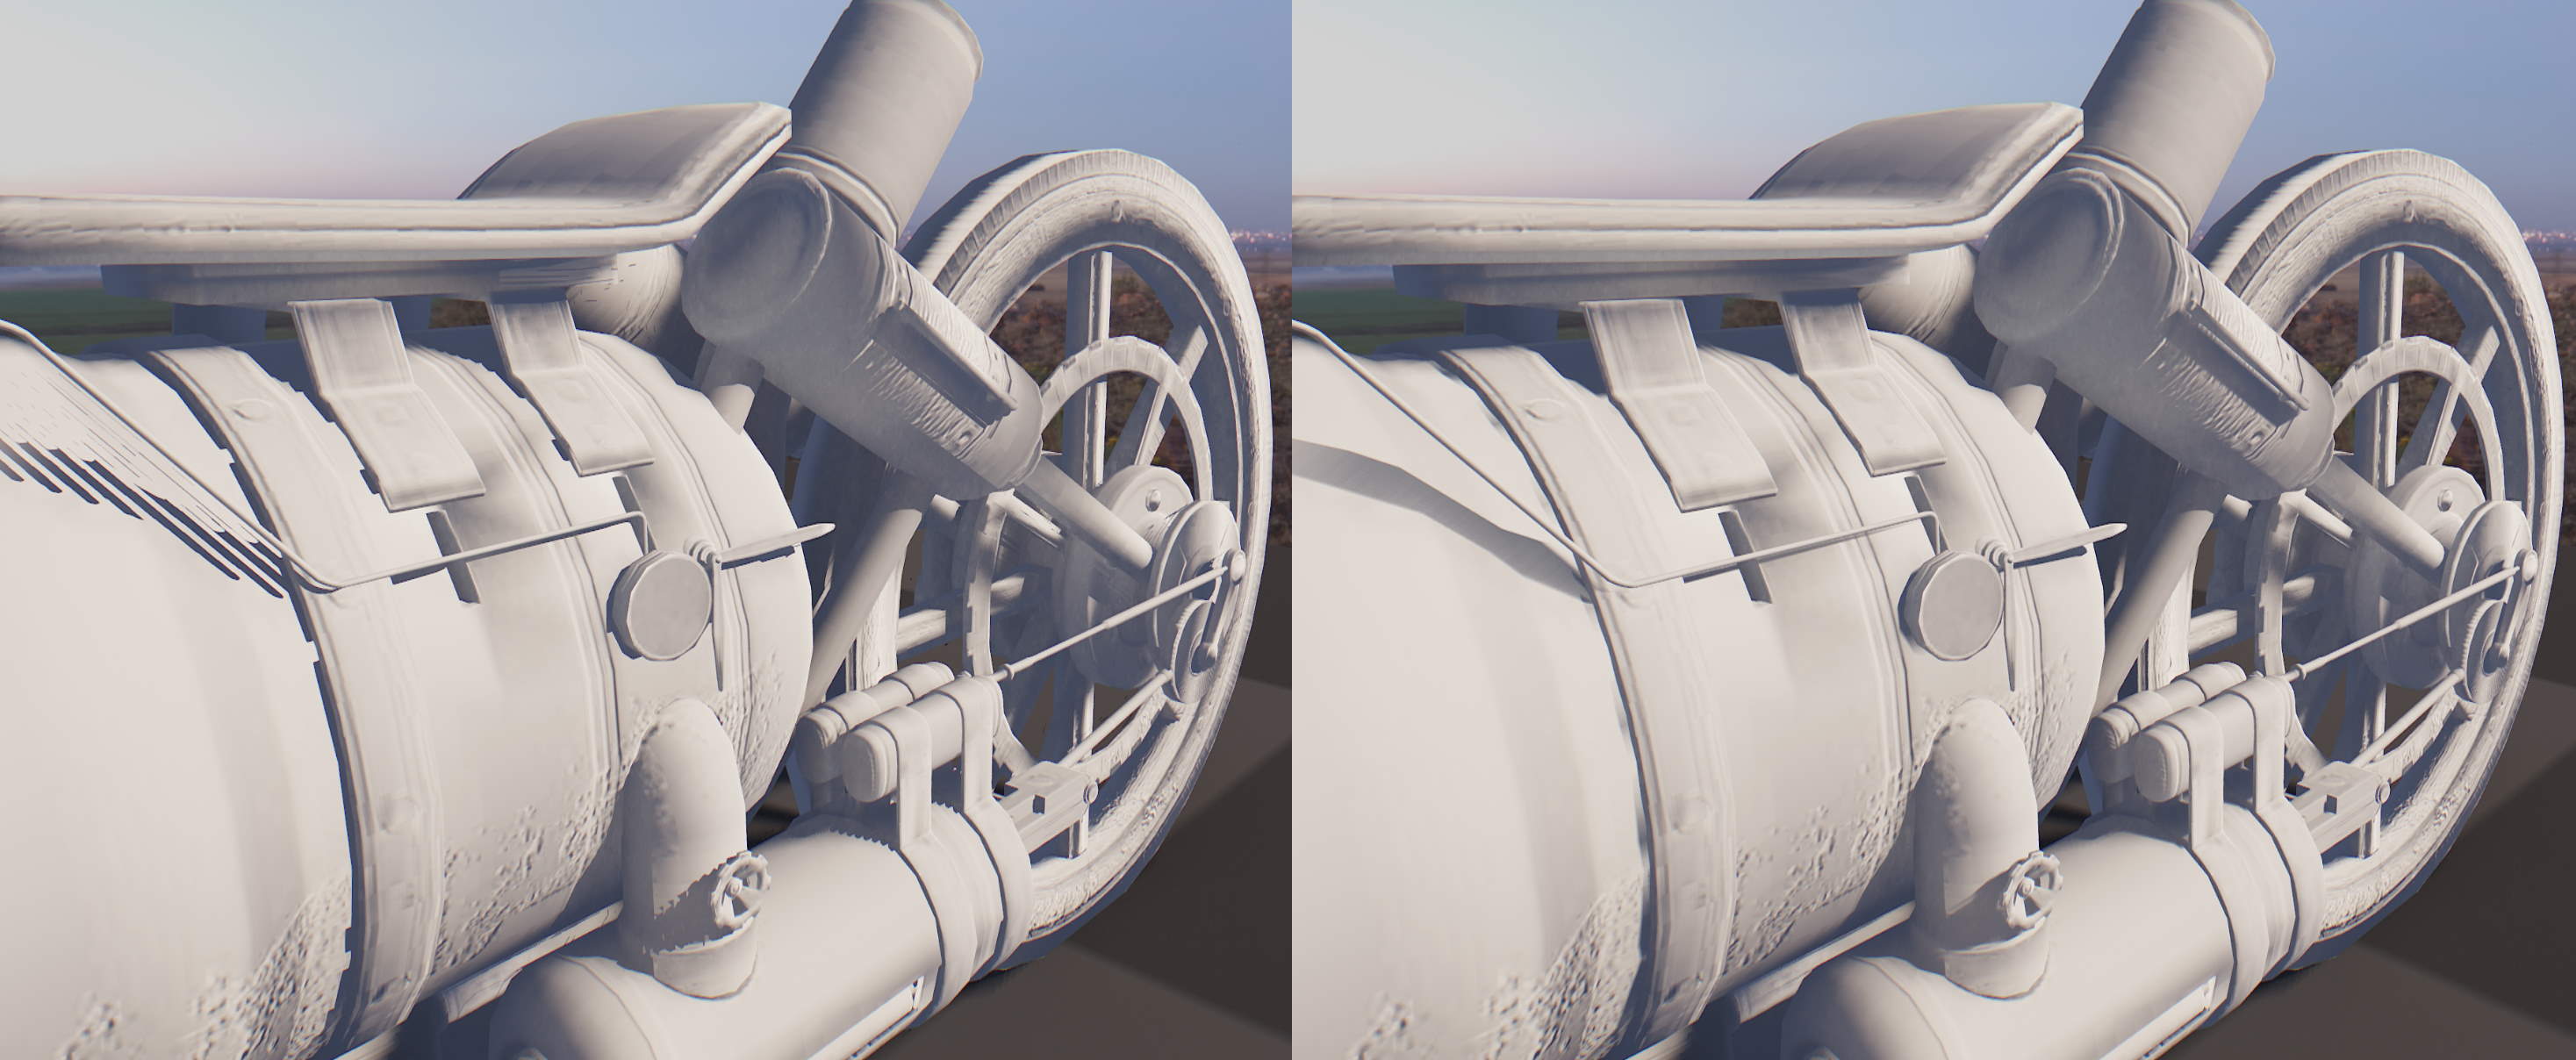
The key lies in enabling both as we can get the best of both worlds.
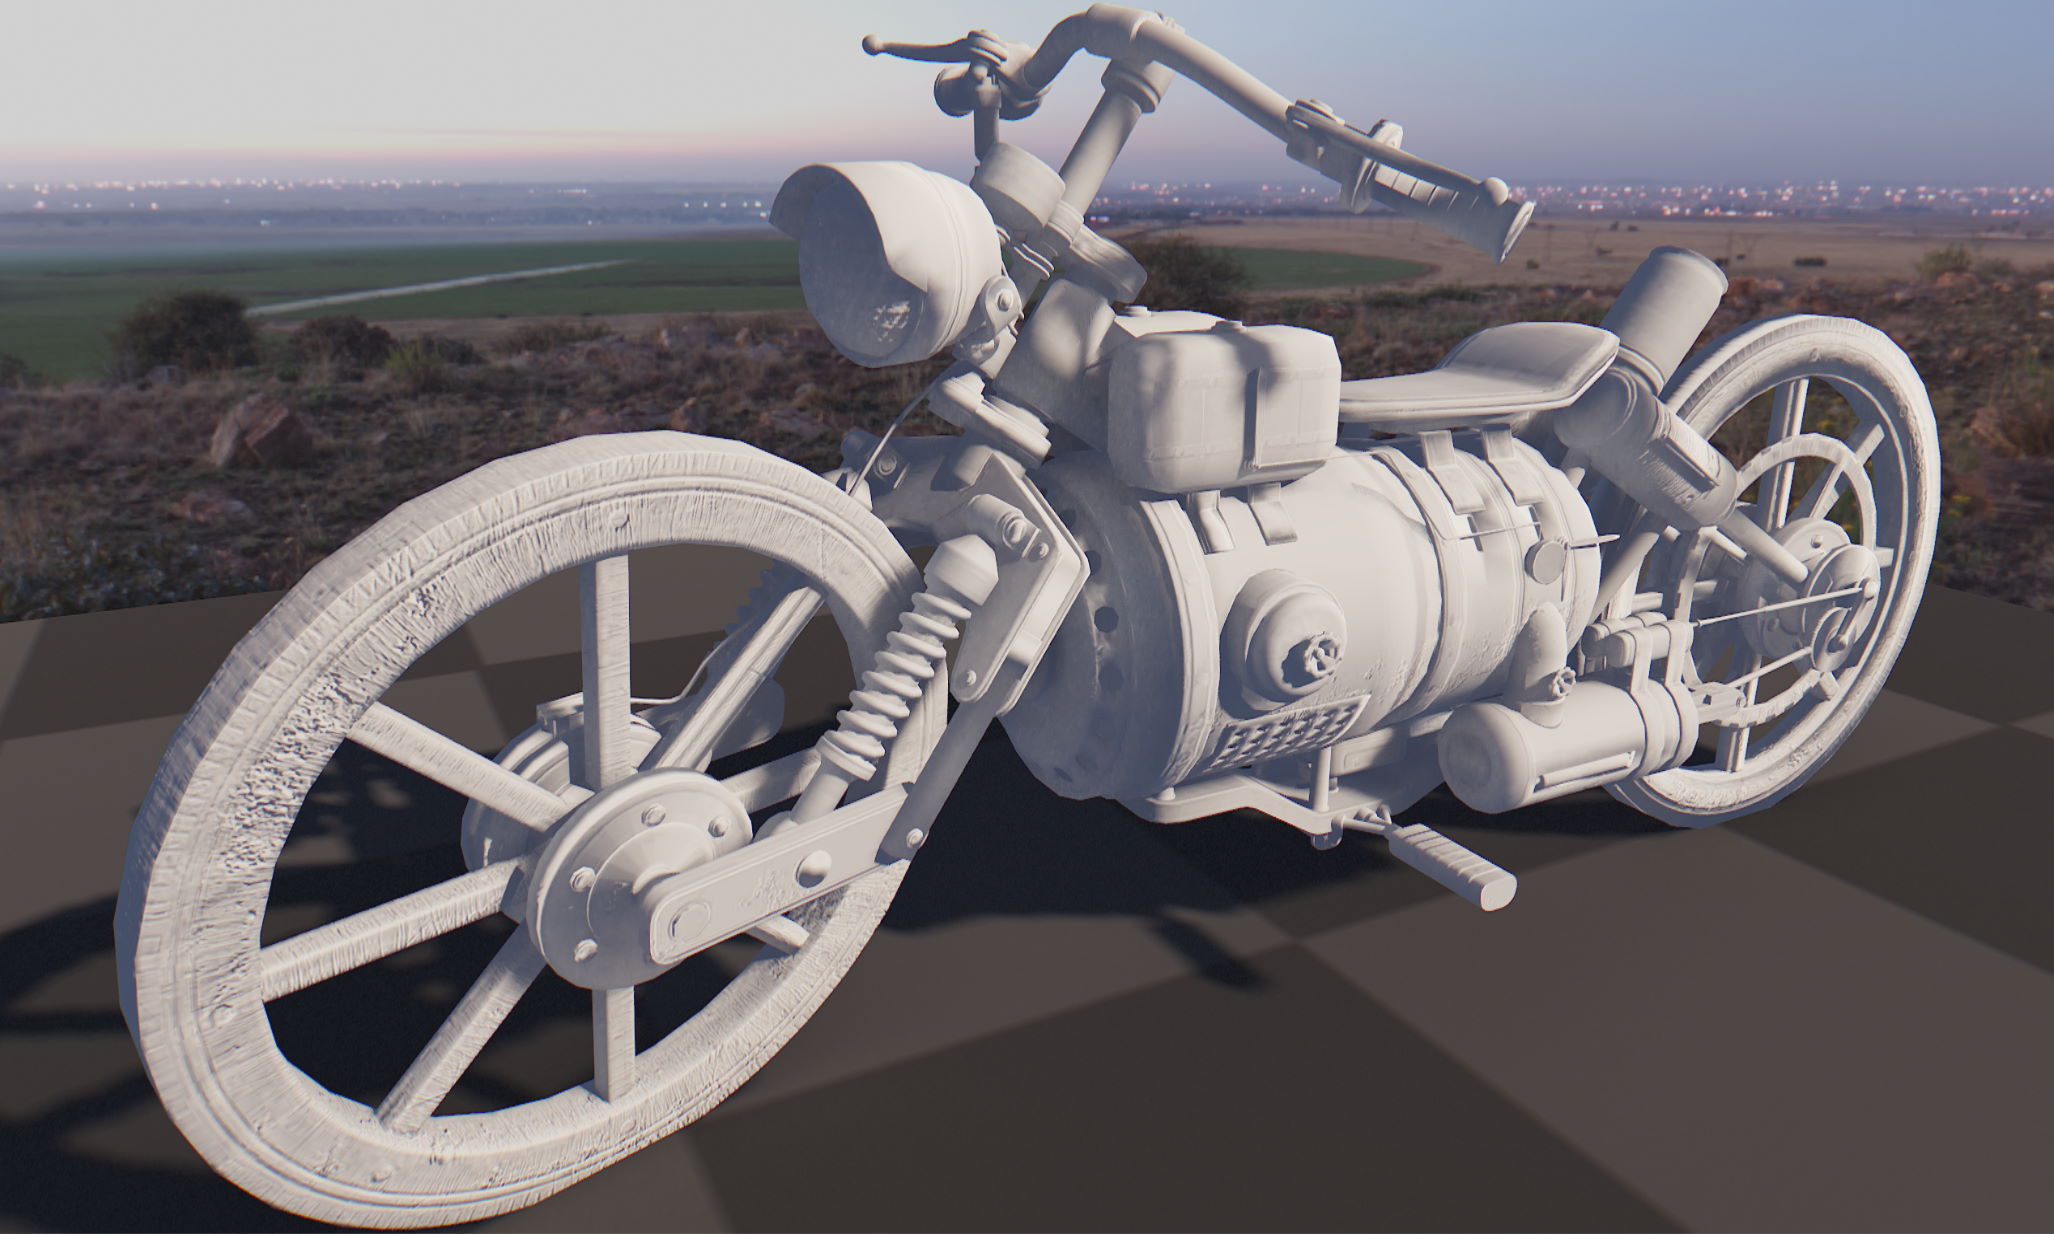
Let’s have a look at a side by side comparison. Beautiful, isn’t it?

Industry comparison
Loss of small-scale detail when doing shadow mapping is a typical problem, especially with lights that aim to cover a large portion of the scene (like directional lights). As we’ve seen, screen space shadows can help a lot but before we explore them in further detail, let’s see how most of the games we enjoy handle small-scale shadow quality:
- The player is allowed to keep increasing the shadow resolution. It’s a costly approach but it works and it happens to be the most common.
- The player sees lights with very high shadow resolution, during key moments like character close-ups. This approach doesn’t suffer from typical screen space issues but it does involve the hard work of manually tweaking lights, per scene.
- The player gets the extra treatment that is screen space shadows. In some cases, the shadows are even aided by normals as well as information from other render passes, all of which help alleviate some screen space issues even further.
An example of some good-looking screen space shadows from Remedy Entertainment.
The algorithm
So how do we go about it? Well, the basic idea is that we start by moving from the pixel to the light. We move in steps, in each step, we compare the depth of our ray against the depth that the camera perceives. If our ray depth is larger (further away) from the camera’s, then we assume that the pixel is in shadow.
{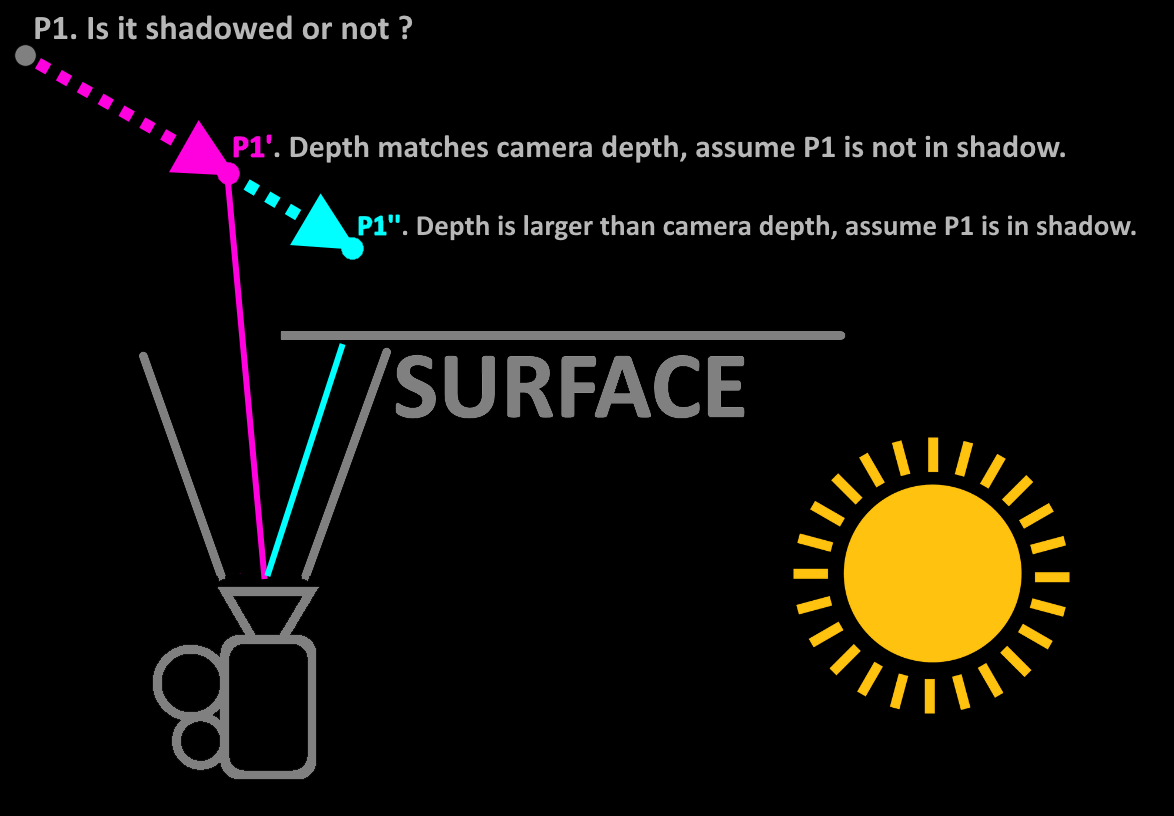
As we can already see, we can’t reliably tell if a pixel is in shadow or not, using only screen space information. But we don’t have to worry that, as if we recall the comparison pictures we saw previously, we only need to supplement shadow mapping, not replace it. So the question really is, is this compromise good enough to provide any meaningful information? And the answer is that it is quite decent at small distances, but less accurate over long distances. So, it’s wise to keep this effect at a small scale. This is also why some people refer to screen space shadows as contact shadows, because shadows can only (reliably) show up when the pixel is very close to its occluder, they almost make contact.
Here is the complete HLSL example with comments were necessary:
// Settings
static const uint  g_sss_max_steps        = 16;     // Max ray steps, affects quality and performance.
static const float g_sss_ray_max_distance = 0.05f;  // Max shadow length, longer shadows are less accurate.
static const float g_sss_thickness        = 0.02f;  // Depth testing thickness.
static const float g_sss_step_length      = g_sss_ray_max_distance / (float)g_sss_max_steps;

float ScreenSpaceShadows(Surface surface, Light light)
{
    // Compute ray position and direction (in view-space)
    float3 ray_pos = mul(float4(surface.position, 1.0f), g_view).xyz;
    float3 ray_dir = mul(float4(-light.direction, 0.0f), g_view).xyz;

    // Compute ray step
    float3 ray_step = ray_dir * g_sss_step_length;

    // Ray march towards the light
    float occlusion = 0.0;
    float2 ray_uv   = 0.0f;
    for (uint i = 0; i < g_sss_max_steps; i++)
    {
        // Step the ray
        ray_pos += ray_step;
        ray_uv  = project_uv(ray_pos, g_projection);

        // Ensure the UV coordinates are inside the screen
        if (is_saturated(ray_uv))
        {
            // Compute the difference between the ray's and the camera's depth
            float depth_z     = get_linear_depth(ray_uv);
            float depth_delta = ray_pos.z - depth_z;

            // Check if the camera can't "see" the ray (ray depth must be larger than the camera depth, so positive depth_delta)
            if ((depth_delta > 0.0f) && (depth_delta < g_sss_thickness))
            {
                // Mark as occluded
                occlusion = 1.0f;

                // Fade out as we approach the edges of the screen
                occlusion *= screen_fade(ray_uv);

                break;
            }
        }
    }

    // Convert to visibility
    return 1.0f - occlusion;
}
A smart tweak
Like with many effects, we can just set a high step count, get good looking results, accept the performance hit and call it a day. Afterall, who has the time to trade banding for noise by offsetting the ray’s start position, blur it, and only then be able to use it, right ? I totally understand and I would like to mention that if we have a TAA implementation in our project, we can do the following.
We can choose a noise function and add a temporal factor to it. I derived my version from Jorge Jimenez’s interleaved gradient noise function, as it works particularly well with TAA.
float interleaved_gradient_noise(float2 position_screen)
{
    position_screen += g_frame * any(g_taa_jitter_offset); // temporal factor
    float3 magic = float3(0.06711056f, 0.00583715f, 52.9829189f);
    return frac(magic.z * frac(dot(position_screen, magic.xy)));
}
And then, in our original shader, just before we start ray marching, we offset the start position. This effectively increases the step count (over time).
// Offset starting position with temporal interleaved gradient noise
float offset = interleaved_gradient_noise(g_resolution * surface.uv) * 2.0f - 1.0f;
ray_pos      += ray_step * offset;
Using only 8 samples is fast but introduces banding, or not ? 😉
That’s all
Before we end this and for the sake of art, let’s appreciate the motorcycle with a material 😄
You can get access to this shader as well as all of my other shaders by clicking here. If you have any thoughts, don’t hesitate to leave a comment or reach out to me via X. I hope that you’ve found this post interesting and that you enjoyed it, stay safe.